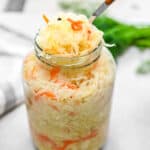
Crunchy Homemade Sauerkraut
This Crunchy Homemade Sauerkraut is crisp, vibrant, and so refreshingly simple. Sweet carrots and tender cabbage ferment into the perfect tangy, probiotic-rich crunch that instantly elevates everyday meals.
Servings 1 jar (1 quart / 1 liter)
Calories 276kcal
Ingredients
For 1-Quart / 1-Liter Jar:
- 2.2 lbs cabbage, shredded (dense, late-season white cabbage works best) (1 kg)
- 1 medium carrot, peeled and grated (50 g)
- 1 heaping tbsp coarse salt, additive-free non-iodized sea salt or pickling salt; no anti-caking agents (20 g)
- 1 small bay leaf
- 4 whole black peppercorns
Instructions
- Remove and discard all the tough, green outer leaves from the head of cabbage until you reach the clean, tight, pale leaves underneath. Cut the cabbage into quarters, slice out the thick core, and shred the leaves thinly using a sharp chef's knife or mandoline (aim for thin ribbons, but not paper-thin dust so it keeps a firm bite). Shred the carrot using a julienne (Korean-style) grater for sturdy matchsticks, or use a coarse box grater.2.2 lbs cabbage, shredded (dense, late-season white cabbage works best) (1 kg), 1 medium carrot, peeled and grated (50 g)
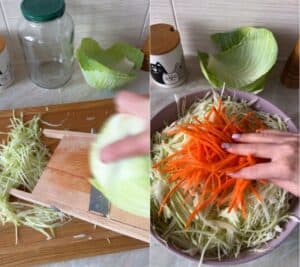
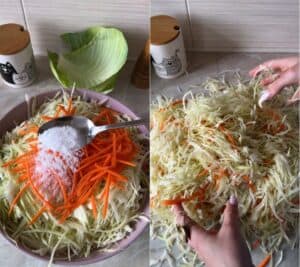
- Place the shredded cabbage and grated carrot into a large, clean mixing bowl. Sprinkle the 20 grams of non-iodized salt evenly over the top. Using clean hands, toss and gently mix everything together so the salt distributes evenly. Never use metal utensils here—fermentation salts and acids react with metal, so stick strictly to wooden tools or your hands. Do not crush, squeeze, or aggressively knead the cabbage into mush—gentle tossing is plenty to let the salt start working while preserving that snappy texture.1 heaping tbsp coarse salt, additive-free non-iodized sea salt or pickling salt; no anti-caking agents (20 g)
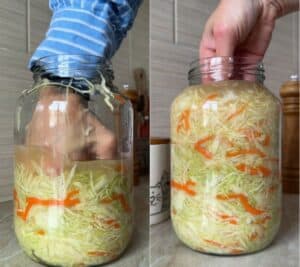
- Begin transferring handfuls of cabbage into a clean 1-liter (1-quart) glass jar, tucking in the optional bay leaves and black peppercorns as you go. After every few handfuls, press down firmly with your fist or a wooden tamper. As you pack it tightly into the jar, the natural juices will begin to release and pool upwards. Keep packing and pressing firmly until all the cabbage is in and natural brine completely covers the top. (Golden rule: the cabbage must always stay submerged under its juice!).1 small bay leaf, 4 whole black peppercorns
- Place the jar in a small bowl or shallow dish right on your kitchen counter out of direct sunlight. This bowl is essential because as the cabbage bubbles and ferments, natural brine will overflow. Rest the jar lid loosely on top, leaving a small gap/crack so the natural carbon dioxide can freely escape without building up pressure.
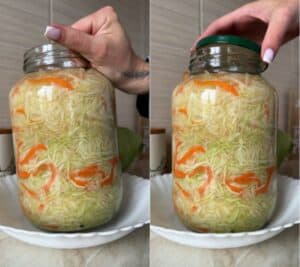
- 5. Pierce and top off with juice.Day 1: Leave the jar alone to let the natural wild fermentation kick off.Day 2: Pierce the cabbage all the way down to the bottom with a clean wooden skewer or chopstick to release trapped gases—never use a metal spoon or knife. Press it back down firmly with your fingers or a clean wooden tool so it stays fully submerged, and pour any overflow juice from the bottom bowl back into the jar to keep the cabbage completely covered in liquid.Days 3–4: Repeat this piercing and pressing routine with your wooden skewer twice a day (morning and evening). Every time you pierce, you’ll see bubbles rush to the surface, which keeps the kraut clean, sweet, and free of any bitterness. Always pour back the collected overflow juice so the top layer never dries out.
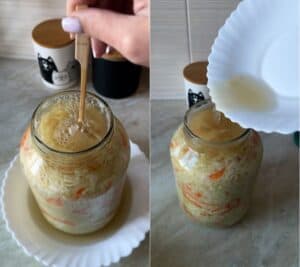
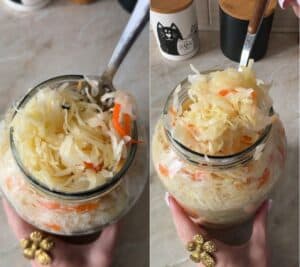
- By day 3 or 4, taste a forkful from the top. Once it hits that pleasant, refreshing tang while staying ultra-crisp, screw the lid on tightly and move the jar to the fridge. The cold temperatures pause active fermentation and keep your sauerkraut fresh and crunchy for months!
Video
Notes
🥗 The Ultimate Way to Enjoy Crunchy Homemade Sauerkraut
Instead of reinventing the wheel with endless additions inside the fermentation jar, the real magic happens right when you serve it. While you can pile this sauerkraut onto sandwiches or grain bowls, nothing compares to turning it into our timeless, rustic winter salad. It takes two minutes to throw together, yet it completely elevates the meal: 🥬 Keep all the tang: Scoop a generous amount of chilled sauerkraut straight from the jar into a shallow bowl. Don't rinse it—you want every bit of that bright, probiotic-rich crunch. 🧅 The onion crunch: Toss in plenty of thinly sliced onion. Mild yellow, red, sweet Vidalia, or fresh green scallions all work beautifully to add a sharp, juicy contrast to the sour cabbage. 🌻 The magic oil: Drizzle everything generously with good oil. If you can get your hands on unrefined, cold-pressed sunflower oil (the deeply aromatic kind that smells like freshly roasted sunflower seeds), buy it immediately—it is literal liquid gold in a bottle and takes this salad to a whole other universe of flavor! Good extra virgin olive oil works wonderfully too, but that nutty, toasted sunflower oil wrapped around the cold, tangy cabbage leaves is an experience you won't forget. 🌿 Fresh garden greens: Finish it off with a handful of finely chopped fresh dill or flat-leaf parsley, plus a crack of freshly ground black pepper. Give it a gentle toss and let it sit for just a couple of minutes so the onion softens slightly in the brine. It is crunchy, fragrant, and shockingly addictive.🫙 Storage & Make-Ahead
🧊 Storage
In the fridge: Keep the jar tightly sealed in the coldest part of your refrigerator (typically the back of the bottom shelf). Under consistent refrigeration, this raw sauerkraut stays vibrant, tangy, and remarkably crunchy for 4 to 6 months (often even longer!). Golden hygiene rule: Always use a clean fork or spoon every time you reach into the jar. Never double-dip or use your fingers, as introducing stray bacteria or oils can spoil the living culture. Keep it submerged: Before sealing the lid back on, always press down on the remaining cabbage so the natural brine rises back to cover the top. As long as it sits safely submerged in its own juice, oxygen can’t dry it out or soften the texture.⏳ Make-ahead tip
This is the ultimate prep-ahead champion because, unlike most fresh salads, it actually gets better as it sits. Once fermentation finishes on the counter and the jar is chilled, the flavor smooths out and develops a deeper, richer tang over the first couple of weeks in the cold. It's ready whenever you need a fast, crunchy side dish—just scoop, dress, and serve in under two minutes!❄️ Can You Freeze Sauerkraut? (Pro Note)
While you can freeze sauerkraut if you plan to cook it into hot stews, soups, or fillings, do not freeze it if you want to enjoy it as a raw, crunchy salad. Freezing ruptures the cell walls of the cabbage and turns that loud, satisfying crunch into a limp, watery mush once thawed. Plus, high cold shocks damage the delicate probiotic community. Stick to the fridge—it lasts for months naturally without freezing!Nutrition
Calories: 276kcal | Carbohydrates: 64g | Protein: 13g | Fat: 1g | Saturated Fat: 0.4g | Polyunsaturated Fat: 0.2g | Monounsaturated Fat: 0.2g | Sodium: 609mg | Potassium: 1898mg | Fiber: 27g | Sugar: 35g | Vitamin A: 11177IU | Vitamin C: 369mg | Calcium: 422mg | Iron: 5mg