

Forget ice cream for a second — we’re frying cones today! These Mushroom Stuffed Cones give you that unbeatable crispy crunch with a warm, comforting filling inside. Oddly genius, ridiculously tasty, and so much fun to make.

I know what you’re thinking: “Julia, have you completely lost your mind?” Ice cream cones… fried on a skillet… stuffed with savory mushroom goodness?! Trust me, I know how unhinged it sounds on paper. But hear me out: this quirky little dish is straight out of my childhood, and back home, it was the undisputed king of festive tables and unexpected cravings.
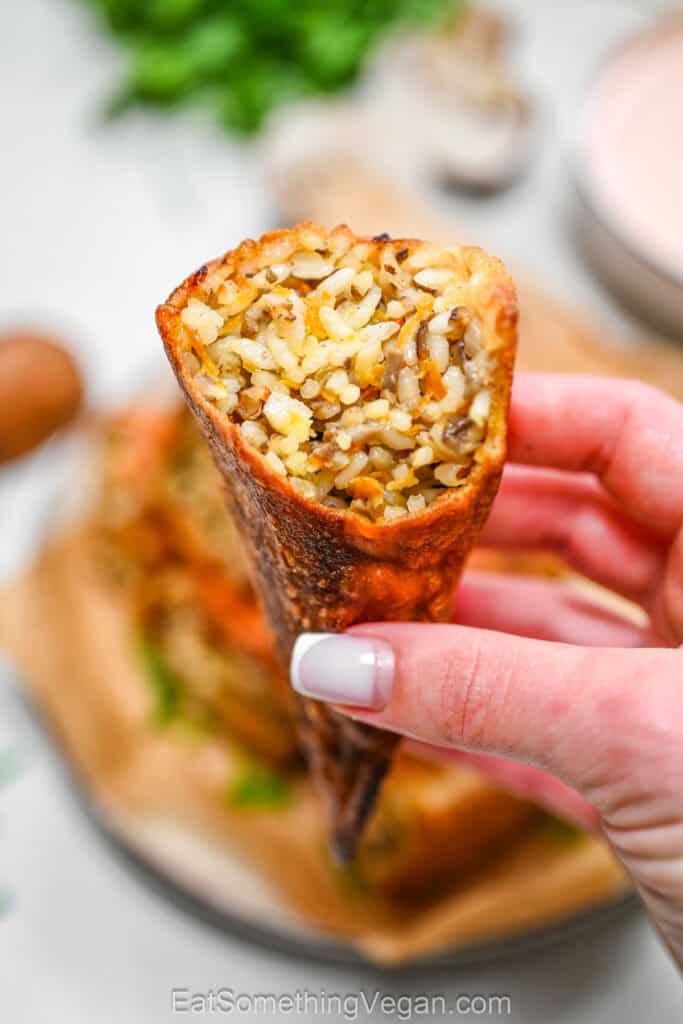
Think about it: we already obsess over crispy spring rolls, golden hand pies, and crunchy taco shells. Why should sweets have all the fun with cones? Whenever someone brought out a plate of these golden beauties, they would vanish faster than you could say “wait, save me one!” The wafer gets this irresistible, shatteringly crisp crust in the hot pan while the seasoned rice filling stays warm, rich, and cozy.
▶️ Video Tutorial
❤️ Why You’ll Love These Crispy Mushroom Stuffed Cones
🤯 Pure conversation starter
Seeing ice cream cones stuffed with mushroom rice instantly stops everyone in their tracks. It’s that fun, quirky party trick that turns every single head at the table.
💥 Shatteringly crisp texture
A quick dip in the batter and a sizzle in hot oil turn the cones into a bubbly, golden shell. That loud crunch against the cozy filling is pure perfection.
🥕 Budget-friendly pantry staples
There are no fancy or hard-to-find ingredients here. Just cooked rice, sautéed carrots, onions, mushrooms, and simple wafer cones you can grab anywhere.
🙌 The ultimate finger food
No forks, no delicate plating, and no mess. The cone shape makes them naturally handheld, easy to dip, and impossible to put down.
🧺 Ingredients for Crispy Mushroom Stuffed Cones
- 🍦 Wafer ice cream cones – 10–12 standard pointed or flat-bottom cones
- 🍚 Cooked white rice – 2 cups (about 400 g), cooled
- 🍄 Cremini or white mushrooms – 7 oz (200 g), finely diced
- 🧅 Yellow onion – ½ large (about 100 g), finely diced
- 🥕 Carrot – 1 small (about 80 g), medium grated
- 🧂 Salt – 1 tsp (5 g), or to taste
- 🌶️ Black pepper – ½ tsp (1.5 g), or to taste
- 🫒 Vegetable oil – 2 tbsp (30 ml) for sautéing + more for frying
For the batter:
- 🥛 Unsweetened plant-based milk – ½ cup (120 ml)
- 🌾 All-purpose flour – 3–4 tbsp (30 g)
📋 How to Make Crispy Mushroom Stuffed Cones
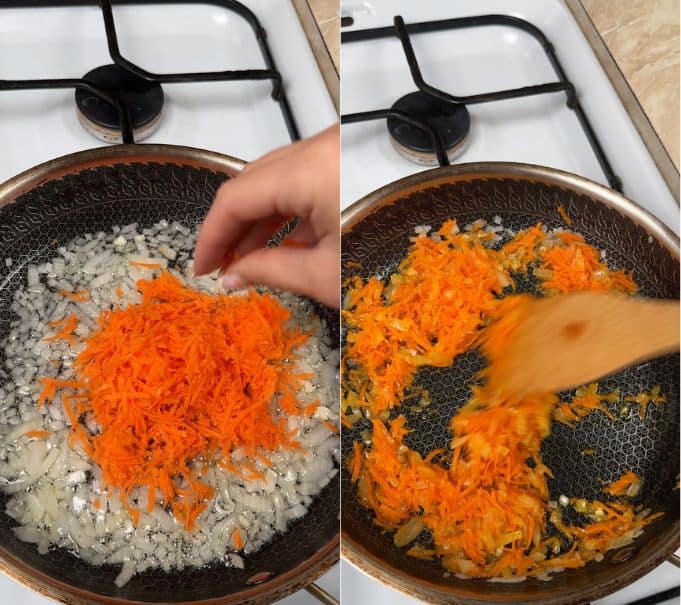
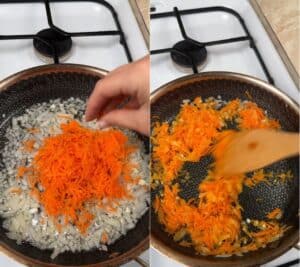
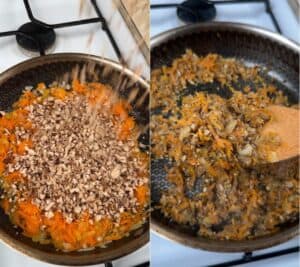
1. Sauté the vegetables Heat 2 tablespoons of vegetable oil in a skillet over medium heat. Add the finely diced onion and medium-grated carrot, cooking for about 4–5 minutes until soft, fragrant, and slightly golden.
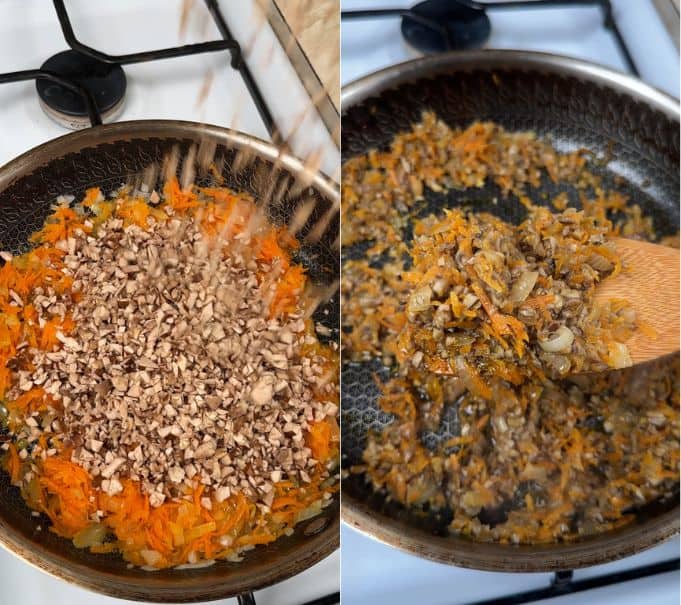
2. Cook the mushrooms Toss in the finely diced mushrooms. Sauté everything together for another 5–7 minutes until the mushrooms release their moisture, shrink down, and turn nicely browned.
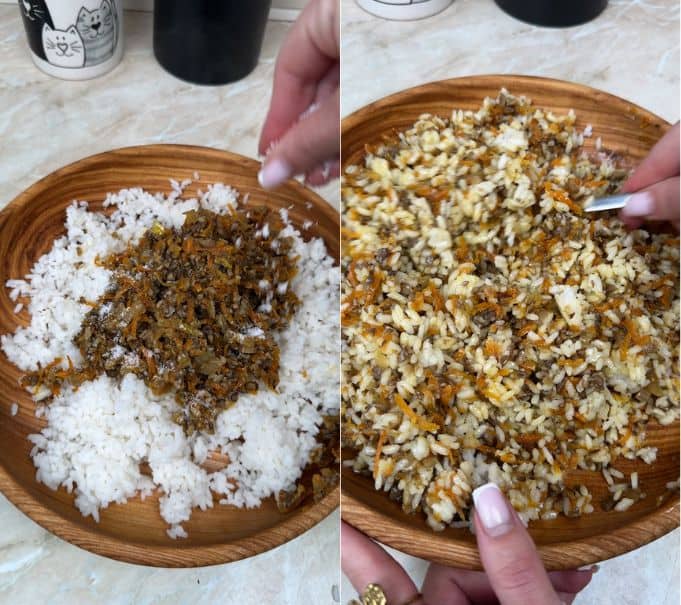
3. Mix the filling Remove the pan from the heat and stir in the cooked white rice. Add the salt and black pepper, mixing thoroughly until everything is well combined and evenly seasoned. Taste and adjust seasoning if needed, then let it cool slightly.
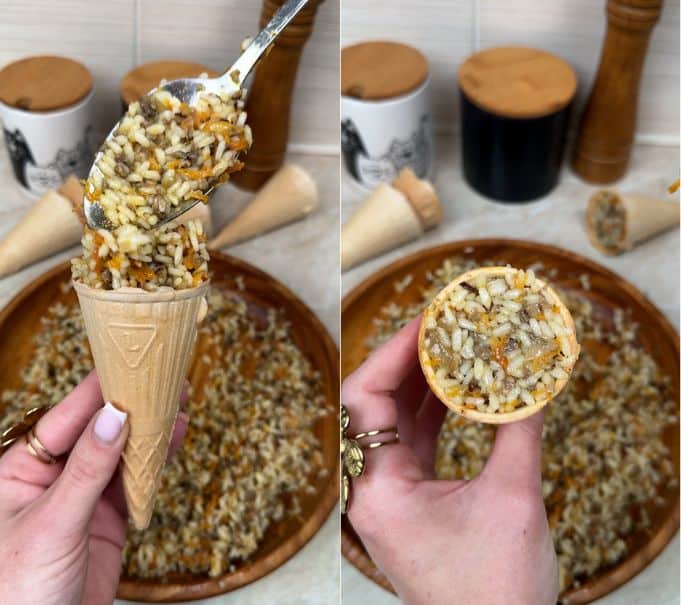
4. Stuff the cones Gently spoon the warm rice mixture into each wafer cone. Use your fingers or the back of a small spoon to pack the filling firmly all the way to the top, being careful not to crack the delicate cones.
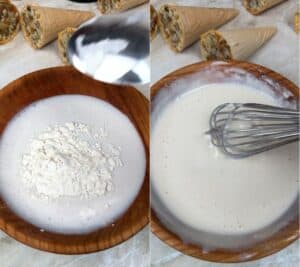
5. Whisk the batter In a shallow bowl, whisk together the unsweetened plant-based milk and all-purpose flour until smooth and lump-free. The consistency should resemble a light pancake batter that easily coats the back of a spoon.
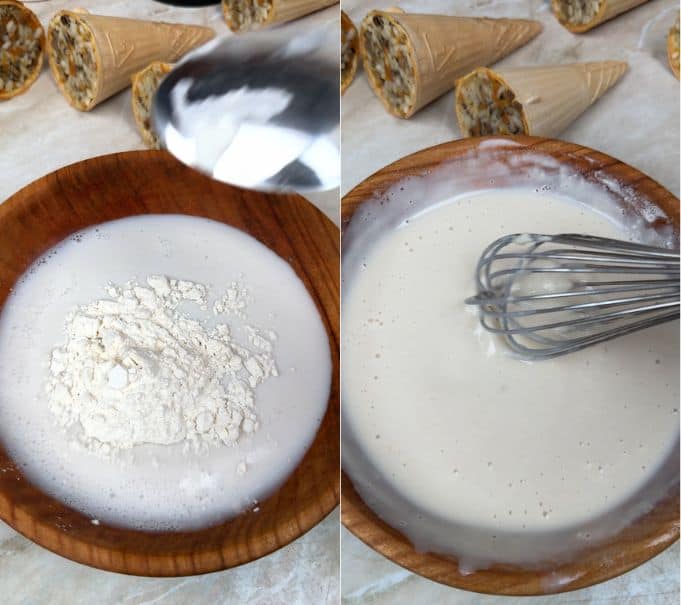
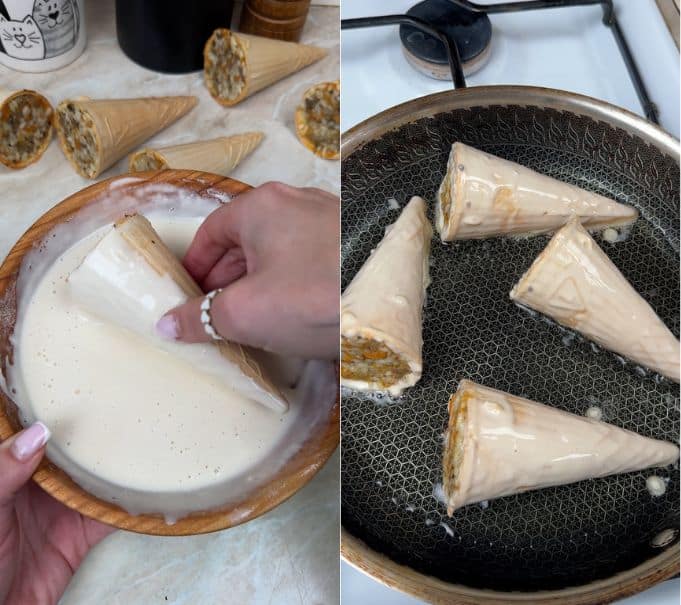
6. Dip and fry until golden Pour enough vegetable oil into a skillet to generously coat the bottom and heat over medium heat. Dip each stuffed cone completely into the batter, letting excess drip off, then place it in the hot skillet. Fry for 2–3 minutes, turning gently to brown all sides evenly until shatteringly crisp and golden. Transfer to a paper towel-lined plate and serve hot!

👩🍳 Cooking Tips for the Best Mushroom Stuffed Cones
🧊 Let the filling cool slightly
Never stuff steaming-hot rice straight into the dry wafer cones. Letting the mixture cool down to warm or room temperature keeps the fragile cones crisp and prevents them from softening before they hit the hot oil.
🥄 Pack gently but firmly
Use a small spoon or your fingers to press the rice filling down so there are no large air pockets inside. Be gentle with your grip around the outer shell to keep the delicate wafer from cracking.
🥣 Keep the batter consistency right
Your batter should coat the cone in a light, even layer without feeling gloppy or overly runny. If it seems too thick, whisk in an extra splash of plant-based milk; if it runs off completely, add another pinch of flour.
🔥 Watch the oil temperature
Fry over steady medium heat rather than high heat. The batter needs just 2–3 minutes to become bubbly, shatteringly crisp, and golden without darkening too quickly or scorching the wafer beneath.
🍚 Rice may seem humble, but it is the ultimate comfort staple. It soaks up all those savory juices, keeping the inside tender, hearty, and deeply satisfying. If you’ve ever wondered why rice is such a wholesome foundation for everyday energy, there’s a nice little read you might enjoy.
🔀 Recipe Variations
🧀 Cheesy comfort
Stir a generous handful of your favorite meltable dairy-free cheese into the warm rice mixture right before stuffing the cones for gooey, savory pockets inside.
🌶️ Spicy kick
Add a pinch of crushed red pepper flakes, cayenne, or a dash of hot sauce directly to the sautéed veggies to bring a bold, warming heat to every bite.
🌿 Fresh herb twist
Fold in finely chopped fresh dill, flat-leaf parsley, or thinly sliced green onions at the very end to give the hearty filling a pop of bright, garden-fresh flavor.
🥔 Mashed potato swap
Have leftover mashed potatoes? Swap out the cooked rice completely or go half-and-half for an ultra-creamy, pierogi-inspired filling wrapped in a crispy shell.
🫙 Storage & Make-Ahead
🧊 Storage
Store any leftover fried cones in an airtight container lined with a paper towel in the refrigerator for up to 3 days.
⏳ Make-ahead tip
You can prepare the savory rice filling up to 2 days in advance and keep it chilled in the fridge. When you are ready to serve, simply stuff the dry cones, dip in batter, and fry fresh for the best crunch.
🔥 Reheating tip
Skip the microwave so the wafer shells do not turn soggy. Pop leftover cones into an air fryer at 350°F (175°C) for 3–4 minutes or onto a baking sheet in a hot oven until heated through and completely crisp again.
🍽️ What to Serve With Crispy Mushroom Stuffed Cones
That tangy, vibrant crunch is hands-down the best pairing here. The natural acidity effortlessly cuts through the rich, golden-fried cones and balances each bite.
Every crispy finger food calls for a refreshing dip! Cool cucumber, garlic, and fresh herbs in this creamy sauce make the ultimate contrast to the warm, savory cones.
Crisp, juicy, and bright, this quick salad adds a clean, refreshing crunch that keeps the whole plate feeling light and lively.
💡 My Tip
Do not soak, just dip and go!
Treat the batter dip like a quick plunge, not a leisurely bath. The wafer cones are naturally light and delicate, so if you let them sit in the wet mixture even a few seconds too long, they will soften before hitting the pan. Dip each cone, roll it quickly so it gets a thin, even coat, let the excess drip off, and place it straight into that hot, sizzling oil. That speedy transfer is the whole secret to getting that loud, shatteringly crisp crust without any soggy surprises!
❓ Frequently Asked Questions About Mushroom Stuffed Cones
Pan-frying gives the best crunch, but an air fryer works great too. Air-fry at 375°F (190°C) for 6–8 minutes, turning halfway through. Skip the standard oven, as it dries them out instead of crisping.
Not if you let the rice filling cool to room temperature before stuffing. Fry them soon after assembling so moisture from the veggies doesn't soften the wafer.
Yes! Just use certified gluten-free wafer cones and swap the all-purpose flour in the batter for a 1:1 gluten-free flour blend.

📝 Final Thoughts
Sometimes the quirkiest kitchen ideas end up becoming absolute favorites, and these golden cones are proof of that. There is something so satisfying about taking humble ingredients from the pantry, wrapping them in a wafer shell, and watching everyone’s faces light up when they hear that first loud crunch. It’s playful, comforting, and just plain delicious.
If you make these at home, drop a comment and your ⭐️⭐️⭐️⭐️⭐️ star rating below! I absolutely love reading how recipes turn out in your kitchen, and your feedback helps more hungry foodies stumble across this fun little dish. Enjoy every crunchy bite!
📄 Scroll down for the full recipe card with step-by-step instructions.
🥔 Craving More Easy Comfort Food? Try My Most Popular Side Dish!
I swear, potatoes and green beans might be the most underrated combo on the planet. Crispy, golden edges, tender garlic-tossed green beans, and almost zero effort. I make this on repeat, and everyone always asks for seconds!


Mushroom Stuffed Cones
Video Tutorial
Ingredients
- 8 wafer cones
- 2 cups cooked white rice
- 7 oz mushrooms, finely chopped
- ½ large yellow onion, finely diced
- 1 small carrot, grated
- 1 tsp salt, or to taste
- ½ tsp black pepper, or to taste
- 2 tbsp vegetable oil
For the batter:
- ½ cup plant-based milk, unsweetened
- 3 tbsp all-purpose flour
Instructions
- Heat 2 tablespoons of vegetable oil in a skillet over medium heat. Add the finely diced onion and medium-grated carrot, cooking for about 4–5 minutes until soft, fragrant, and slightly golden.½ large yellow onion, finely diced, 2 tbsp vegetable oil, 1 small carrot, grated

- Toss in the finely diced mushrooms. Sauté everything together for another 5–7 minutes until the mushrooms release their moisture, shrink down, and turn nicely browned.7 oz mushrooms, finely chopped
- Remove the pan from the heat and stir in the cooked white rice. Add the salt and black pepper, mixing thoroughly until everything is well combined and evenly seasoned. Taste and adjust seasoning if needed, then let it cool slightly.2 cups cooked white rice, 1 tsp salt, or to taste, ½ tsp black pepper, or to taste
- Gently spoon the warm rice mixture into each wafer cone. Use your fingers or the back of a small spoon to pack the filling firmly all the way to the top, being careful not to crack the delicate cones.8 wafer cones
- In a shallow bowl, whisk together the unsweetened plant-based milk and all-purpose flour until smooth and lump-free. The consistency should resemble a light pancake batter that easily coats the back of a spoon.½ cup plant-based milk, unsweetened, 3 tbsp all-purpose flour
- Pour enough vegetable oil into a skillet to generously coat the bottom and heat over medium heat. Dip each stuffed cone completely into the batter, letting excess drip off, then place it in the hot skillet. Fry for 2–3 minutes, turning gently to brown all sides evenly until shatteringly crisp and golden. Transfer to a paper towel-lined plate and serve hot!



Notes
🔀 Recipe Variations
🧀 Cheesy comfort Stir a generous handful of your favorite meltable dairy-free cheese into the warm rice mixture right before stuffing the cones for gooey, savory pockets inside. 🌶️ Spicy kick Add a pinch of crushed red pepper flakes, cayenne, or a dash of hot sauce directly to the sautéed veggies to bring a bold, warming heat to every bite. 🌿 Fresh herb twist Fold in finely chopped fresh dill, flat-leaf parsley, or thinly sliced green onions at the very end to give the hearty filling a pop of bright, garden-fresh flavor. 🥔 Mashed potato swap Have leftover mashed potatoes? Swap out the cooked rice completely or go half-and-half for an ultra-creamy, pierogi-inspired filling wrapped in a crispy shell.🫙 Storage & Make-Ahead
🧊 Storage
Store any leftover fried cones in an airtight container lined with a paper towel in the refrigerator for up to 3 days.⏳ Make-ahead tip
You can prepare the savory rice filling up to 2 days in advance and keep it chilled in the fridge. When you are ready to serve, simply stuff the dry cones, dip in batter, and fry fresh for the best crunch.🔥 Reheating tip
Skip the microwave so the wafer shells do not turn soggy. Pop leftover cones into an air fryer at 350°F (175°C) for 3–4 minutes or onto a baking sheet in a hot oven until heated through and completely crisp again.Nutrition




Leave a Reply